Pages

Showing posts with label Cuisine: French. Show all posts

French tomato tart with a lot of mustard

French tomato and mustard tart / Prantsuse sinepine tomatipirukas

I guess you gathered from yesterday's tomato posting that we're swamped with tomatoes this year. That means lots of tomato dishes - like this flavorsome tomato salad, for instance. Here's another flavoursome tomato dish - a mustardy French tomato tart that's excellent with some peppery green salad leaves. Choose tomato variety with few seeds, as then you don't have to deseed or drain them first and save some valuable time for yourself.

French tomato tart
(Sinepine tomatipirukas)
Serves six to eight

Crust:
200 g plain flour
pinch of salt
100 g butter
1 egg

Topping:
3 Tbsp sour cream, creme fraiche or double cream
3 Tbsp Dijon mustard
5 to 6 medium sized tomatoes
sea salt flakes and freshly ground black pepper
fresh thyme or oregano
extra virgin olive oil, to drizzle

First make the tart crust. Mix flour, salt and cold cubed butter in the food processor until crumbly, then add the egg and give it a few turns. Press into a dough ball with your hands, then use your fingers to line a 26 cm pie dish with the dough. Pierce the bottom with a fork in a couple of places, then place into the fridge for half and hour.
Bake the cool crust in a preheated 200 C oven for about 15 minutes (you can also blind-bake, but I didn't bother with that).
Combine mustard and cream, then spread onto the base of the pre-baked pie crust.
Cut the tomatoes, crosswise, into 5 mm slices, layer nicely onto the mustard layer. Season with salt and pepper.
Bake in the pre-heated 200 C oven for about 40 minutes, until tomatoes are nicely roasted and coloured.
Drizzle with some olive oil, sprinkle fresh thyme or oregano leaves on top and serve either hot or cold.

Poulet aux quarante gousses d’áil or chicken with 40 cloves of garlic


Here's a dish that I made several times during last year - and hope to make again as soon as the fresh, new season's garlic appears on the market stalls in a couple of months. It's a dish that I had been intrigued by for ages - imagine, 40 whole garlic cloves to season just one chicken! - and when I finally made it, I fell instantly in love with it. When researching the dish, I came across several and very different versions. After making it several times, I've settled for this minimalist one. Just chicken, olive oil, lots of garlic and some salt'n'pepper. If you like your chicken with crispy skin and sticky, browned bits, then this version isn't perhaps for you, though you can always brown the chicken on a frying pan first and give it a short blast under the grill at the end.

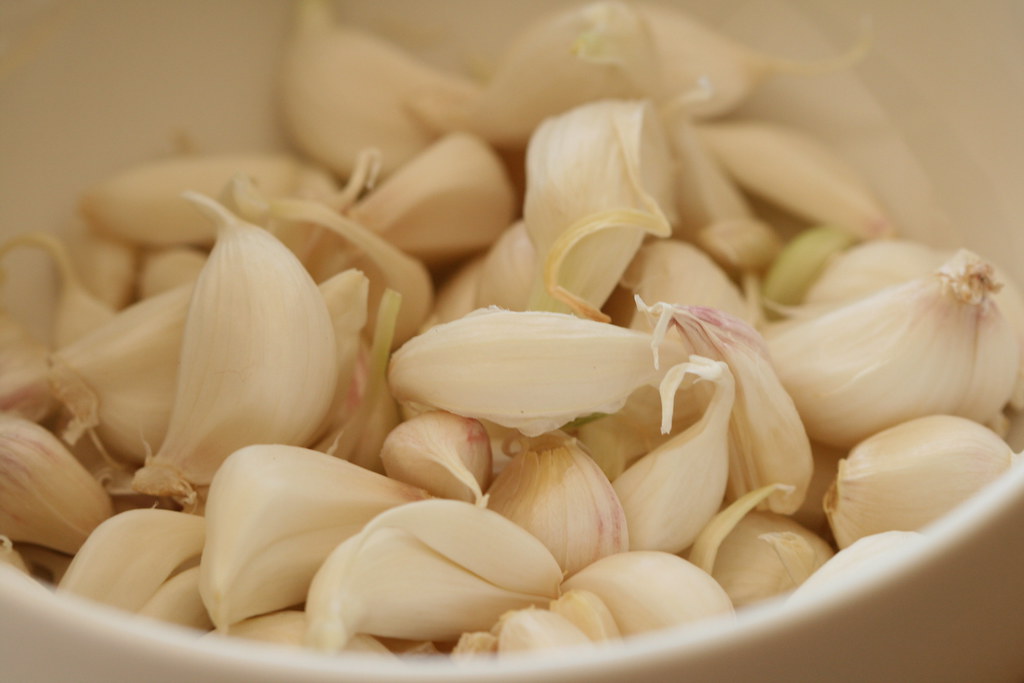
The dish originates in Southern France, Provence, which is famed for its excellent olive oil and large, rosy-tinged garlic cloves. I love making this with young fresh garlic (see photo here), but it works with any garlic. Although the amount of garlic sounds somewhat over the top, then trust me and don't be tempted to choose some tiny garlic cloves. The bigger, the better here. Also, I'm sure the French would use a good extra virgin olive oil here, but if price is the issue, then any good olive oil works here.

Chicken with 40 cloves of garlic
(Kana 40 küüslauguküünega)
Serves 6

Poulet aux quarante gousses d'ail / Chicken with 40 cloves of garlic / Kana 40 küüslauguküünega

1 whole chicken, preferably free-range (about 1,5 kg)
salt and freshly ground black pepper
40 large garlic cloves (from 4-5 whole heads of garlic)
250 ml (1 cup) olive oil
fresh herbs of your choice (rosemary, sage, thyme, bay leaves)

First, prep your garlic cloves. When making this with fresh and young garlic cloves, then there's no need to peel them. During winter you should first blanch your garlic cloves in boiling water for 1 minute, then drain and remove the softened papery skins.
Using a kitchen paper, pat the chicken dry. Season generously with salt and pepper, both inside and out. Place the chicken, breast-side up, into a Dutch oven or heavy casserole dish where the chicken fits snugly (the better the fit, the less oil you need).
Push the garlic cloves and herbs around the chicken, pressing them down between the chicken and the dish.
Pour over the olive oil - check that all the garlic cloves are covered with oil.
Cover the saucepan and place into a preheated 180 C/360 F oven. Bake for 1 hour and 15-30 minutes, until the chicken is cooked.

Poulet aux quarante gousses d'ail / Chicken with 40 cloves of garlic / Kana 40 küüslauguküünega

To serve, carve the chicken into suitably large chunks. Serve with fresh green salad leaves and some wholemeal bread to mop up the delicious garlicky juices. Don't forget the softened and mellowed garlic cloves - these are the extra bonus of the dish. I love pressing them onto piece of bread.

* You can use the leftover garlicky olive oil to dress up a salad or serve as a seasoned frying oil during the next few days.

Fig and Goat Cheese Clafoutis


I'm still taking full advantage of the availability of good quality fresh figs at the markets at the moment. The figs are from Turkey, with dark purplish skin and beautifully pink insides. I've got no idea what's the actualy name of the specific fig variety. They're a bit too plump and round for Black Mission. Perhaps Brown Turkey?

One of the fig recipes I had bookmarked already three years ago was Melissa's Fig and Goat Cheese Clafoutis, and I was excited to finally try this at home. I can testify that it's a wonderful clafoutis recipe - the tart creamy goat cheese indeed made it taste a bit like cheesecake, it had a lovely clafoutis conistency, and it looked absolutely amazing. We enjoyed it when still slightly warm, and I think that's when the clafoutis is at its best, but it tasted also good when completely cool.

Do try it, if you've got a chance.


See here for the Estonian recipe: Viigimarjavorm kitsejuustuga.

Rustic Apricot Tart


We ate quite a few of those delicious Bergeron apricots while in France, and back home, I was craving for more. So I made this ridiculously easy rustic apricot tart. This is the only free-form tart I've ever made, but I've made it several times, so it's quite a favourite. Once you've got the pastry out of the way, it's really just the matter of piling the fruit on top of it.

Note that this is just as lovely, if not better, on the following day. The apricot might look slightly worse for wear, but the pastry improves from some standing, as the moisture in the air makes it nicely crumbly and soft.

Delicious with either a scoop of vanilla ice cream or a dollop of whipped cream.

Rustic Apricot Tart
(Aprikoosipirukas)
Serves six to eight


Pastry:
150 g unsalted butter, at room temperature
100 g caster sugar
1 large egg
a pinch of salt
250 g all purpose/plain flour
0.5 tsp baking powder

If using a food processor, place sugar, salt, baking powder and flour in the processor and blitz to combine. Add butter and process until fine crumbs form. Add the egg, pulse couple of times until the mixture looks moist. Take out of the processor and knead with your hands until combined. Press into a flat disk.
Place the pastry on a baking sheet covered with parchment paper and a light dusting of flour. Roll out into something reminding you of a circle, about 5-6 mm (1/3 inch) thick.

Topping:
10-12 large apricots, stoned
100 ml all-purpose/plain flour (just under a cup)
100 ml caster sugar (just under a cup)
100 ml ground almonds/almond meal (just under a cup)

Mix flour, sugar and ground almonds until combined, pour into the middle of the pastry circle, leaving about 5 cm (2 inches) clean border around it.
Now layer the apricots of top, making about three layers, each one smaller than the one just under it.
With the help of the baking paper and floured hands, fold the edges of the pastry over the apricots (see the picture below).
Bake in a preheated 200 C / 400 F oven for about 20-25 minutes, until the apricots are soft and the pastry golden brown and cooked.
Remove from the oven, let cool a little and then gently transfer onto a cake plate.


Ispahan, almost


K. was in Brussels for two days and brought me this Macaron Joy from Wittamer pastry shop. The rose cream, raspberries and lychee are all there, but the signature red rose leaf is missing.

Rather delicious, I must admit. I had this with a cup of freshly ground Has Bean's Guatemala COE La Perla y Anexos speciality coffee this morning..

Mussels in Apple Cider Recipe


Take note - this is the first time I've blogged about a mussel dish, as well as first time I cooked mussels. But the resulting dish was a great success, and according to everybody who tried this, the recipe is definitely worth sharing. So that's what I'm doing :)

I served this on one of our semi-regular Scrabble nights, and we drank regular and almost alcohol-free French cider alongside this. It was a very good night indeed..

Mussels in Apple Cider
(Siidriga aurutatud rannakarbid)
Serves 4 as a starter or a light meal


1 kg fresh, live mussels
3 Tbsp olive oil
1 Tbsp butter
50 g shallots, finely chopped
2 to 3 garlic cloves, finely sliced
1 large Granny Smith apple, peeled and cut into 1 cm cubes
1 lemon
300 ml (about 1 1/4 of a cup) dry French cider (we used Cidre Brut de Normandie)
1 tsp fresh thyme leaves

Clean the mussels carefully under cold running water. Throw away any mussels that are broken or that don't close when tapped gently.
Heat oil and butter in a large wide saucepan. Add shallots and garlic and sauté gently, stirring all the time, for about a minute.
Add apple cubes and cook for another minute or two.
Add cider, the grated lemon peel and lemon juice and thyme. Bring to the boil (NB! no need to season with salt).
Now add the cleaned mussels, shake the saucepan a few times and cover with a lid. Cook for about 2 minutes, then shake the mussels again. Cook for another 2-3 minutes, until all mussels have opened (throw away the few stubborn ones).

Serve the mussels with the cooking broth, garnish with some extra thyme. Some white ciabatta-style bread would be a perfect accompaniment for mopping up the cidery juices..

Macarons, made by K.


K made macarons for the New Year's Eve party. We had quite a few friends over for that occasion, and whereas I was mainly in charge of the savoury dishes, K. had (almost) free hands in deciding which sweet dishes to offer. He had wanted to make macarons for ages, so he decided to go ahead.

I must admit that I was a bit hesitant to start with. Macarons, as we all know (or at least that's the feeling I get when reading bloggers who have made them), are a tricky concoction, to say the least. They sound deceptively simple - icing sugar, ground almonds, egg whites - yet there are hundred tricks and insider tips you must know in order to succeed. Also, as you cannot buy ground almonds in Estonia, K. had to grind his own - using our small old coffee grinder - and sieve the meal again and again. Then you had to wait for the egg whites to dry and so on. In the midst of the preparations for a successful New Year's Eve party, our kitchen was a mess - and occupied by him - for much longer than I had ever planned or wanted..

But - his macarons were a success! He made three different types - matcha macarons with dark chocolate ganache, lingonberry macarons (substituting some of the almonds with ground dried lingonberries - that's the Estonian twist) with blackcurrant buttercream a la Pille (aka icing sugar mixed with soft butter and some unsweetened blackcurrant juice), and plain macarons with plain buttercream.

They were beautiful and delicate and very much macaron-like. Loved these!!!

K. wants to thank Kuidaore and Tartelette as well as Melissa for their excellent tips on how to succeed with macarons.


You can see more pictures here.

Makroonide teema Nami-Nami foorumis

Nigella Lawson's Cider and Mustard Pork Chops

I'm back and none of my bones are broken, although I've got some bruises here and there. It's not easy to slide those Alpine slopes when you're only on your second skiing holiday, you know :)

Today is the 90th anniversary of Estonian Republic, and I had planned to cook something special and Estonian to mark that special occasion. However, we're still a bit exhausted from all the travelling, and hence I decided to cook a very simple recipe from my most recent cookbook acquisition, Nigella Express. I got the book as a gift from a very special friend of mine, Roxy, who occasionally comments here on my blog, and I'm thrilled to bits, as I love my other three Nigella cookbooks (How to Be a Domestic Goddess, How to Eat, Feast). And the first recipe that caught my eye was Mustard Pork Chops (p. 11) - a French bistro classic, apparently. Here's a very slighty adapted version (Nigella used ready-made garlic oil) of an excellent, effortless, flavoursome and quick supper dish. K. was especially fond of the creamy cider-mustard sauce, so we'll probably have this one again soon.

We used Maille's A l'Ancienne mustard and the award-winning Ecusson Grand Cidre Pur Jus Doux cider.

Nigella Lawson's Cider and Mustard Pork Chops
(Sealihakotletid sinepi-siidrikastmes)
Serves 2


2 pork chops, approximately 450 g in total
1 Tbsp olive oil
1 garlic clove, peeled and bruised
125 ml cider
1 Tbsp grainy mustard
75 ml double cream
salt

Bash the pork chops 'briefly but brutally' (Nigella's words) with a rolling pin between two sheets of clingfilm to flatten them.
Heat the oil in a heavy-based frying pan, add the bruised garlic clove and fry gently for 1-2 minutes to infuse the oil with garlic. Remove the garlic clove and discard.
Add the pork chops and cook them over a moderately high heat for about 5-6 minutes on each side, until golden brown. Try not to move the pork chops during frying, as this way you'll get a nice even crust. Season with salt, if you wish. Remove to a warmed plate, cover with foil to keep warm.
Pour the cider into the pan, still over the moderately high heat, to de-glaze the pan. Cook for 1-2 minutes.
Add the mustard, stir, then add the cream and cook for a few minutes.
Place the pork chops on plates and spoon the cider and mustard sauce over.

Nigella served her mustard pork chops with potato gnocchi, we had a simple side salad.

***** I'm submitting this to this month's Weekend Cookbook Challenge # 25 Nigella Lawson and hosted by Ani at FoodieChickie *****

Tarte au Chocolat - the darkest chocolate cake ever

French chocolate cake / Prantsuse šokolaadikook
Photo updated in November 2010

If yesterday's salted butter caramel and milk chocolate mousse wasn't your cup of tea (maybe you're not into this salted butter caramel thing, or maybe you simply prefer dark chocolate to milk chocolate), then here's another dessert to satisfy your chocolate cravings this week: Tarte au Chocolat. It's very, very dark and intensely chocolatey, with crazy amount of butter and sugar added (with just a spoonful of flour, so if you're eating gluten-free, you could easily substitute gluten-free flour here). I got the recipe from a Finnish recipe leaflet "Jälkiruokaklassikkoja Ranskasta" or "Classic desserts from France" - and it had got rave reviews on my Estonian site, so I decided to try it myself. I'm glad I did - it tasted absolutely wonderful. If yesterday's pud was juvenile, to use Luisa's words, then this is very, very adult indeed.

Tarte au Chocolat
(Tarte au Chocolat ehk prantsuse šokolaadikook)
Serves 10


200 g dark chocolate (I used 72%)
200 g butter
200 g caster sugar
4 large eggs
1 Tbsp plain/all-purpose flour

Break the chocolate into pieces and melt with butter either in a microwave or in bain marie. Stir in sugar, let cool a little.
Using a wooden spoon, mix in eggs, one at a time.
Sift in the flour, stir until combined.
Pour the batter into a buttered 24 cm springform tin. Bake in the middle of a preheated 200C oven for about 25 minutes, until the cake is slightly crisp on the top, but still moist inside (see photo).
Take out of the oven and cool. Serve with whipped cream and season's berries.

More tasty chocolate cakes on Nami-nami:
Chewy Chocolate Walnut Brownies (January 2008)
David Lebovitz's Chocolate Sauerkraut Cake with Chocolate Glaze (December 2007)
Nigella Lawson's chocolate cherry cupcakes (April 2006)
Nigella Lawson's Store-cupboard Chocolate-Orange Marmalade Cake (November 2005)

K is guest-blogging about Cannelés, those little caramelised, irresistible buns from Bordeaux

[Pille is off to Budapest for a few days, so K. is using the opportunity to guest-blog again..]

Few years ago I took some French language courses in the city of Bordeaux, and opted for accommodation with a local family. I ended up staying with an excellent old-school French hosts: a retired couple Marie-Lucie and her husband Jean-Pierre, who had accommodated over hundred language students over the years.

Just before my arrival, the family had accommodated a student from Saudi Arabia, for whom it was the first trip outside his home country. Coming from deeply religious surroundings he couldn’t eat pork or drink wine. Seeing students from all over the world, always joyful Marie-Lucie was used to different cultures. But she also adored cooking and eating traditional and delicious French food, including some Clairet wine and hearty pork dishes... Sitting together at a dinner table was a sacred tradition for Marie-Lucie and Jean-Pierre. You can imagine how relieved they were to welcome a hungry Estonian guy appreciating everything her kitchen had to offer. In turn, I was ready to learn and be seduced by the Bordeaux cuisine.

During my two-week stay we savoured four-course dinners at home almost on a daily basis. The entire house was open for guests, except the kitchen in the mornings. It was behind these closed kitchen doors that Marie-Lucie and Jean-Pierre decided on the evening's menu. Most of the recipes were kept as small handwritten notes in huge plastic boxes labelled “poissons/crustaces”, “viande”, “entrées/legumes” etc (see photo on the right).

As expected, I could not keep myself out of the kitchen, and I learned many things. For example, do you know what the secret of happy marriage is? If wife and husband do not have an argument about finances, but argue about the perfect recipe for Tomates Antiboise. Jean-Pierre put the capers together with canned tuna into a blender. While I asked tête-à-tête from Marie-Lucie whether it would be better to chop the capers, she said that when they had been younger, she had a big argument with Jean-Pierre about this fundamental issue and she personally thinks that the capers should be chopped with knife instead of crushed in blender. But now, after several decades of conjugal life, she has given up and lets her beloved husband to do like he wants. On the other hand, although Jean-Pierre liked tête de veau, a French classic dish so vividly described in A Cook's Tour by Anthony Bourdain, and knew how to make it, it was a forgotten delicacy in the family as Marie-Lucie was not particularly fond of it.

I also had breakfasts at their home, enjoying different jams and cheeses. One weekend morning I was served innocent-looking buns that tasted superb. Before even noticing, I was already reaching for the fifth bun. Later I have learned that substantial quantities of cannelés can vanish very quickly in the presence of children and grown-ups alike. This was my first experience with cannelés, a miracle bun from Bordeaux that has not only an extensive Wikipedia entry in English, but even several dedicated web sites in French. Cannelé has interesting history, wrapped in the mystery.

This simple pastry, made of eggs, milk and flour flavoured with rum and vanilla is currently hugely popular both in Aquitaine and Gironde, with hundreds of producers. But as it turns out, it is rather easy to bake at home. Marie-Lucie kept always the batter on hand when the grandchildren were visiting, because they always asked for cannelés.

Traditionally, cannelés are baked in special metal fluted moulds (cannelé means 'fluted'). We have got silicone moulds at home - they are easier to handle, even if they don't yield as caramelised crust as metal moulds do. Usually 8 cannelés can be made with one mould and I strongly recommend buying at least two. If you're based in the US, then you can buy tin-lined copper cannelé molds and silicon mini cannelé molds - both by Matfer Bourgeat - from Amazon.com.

Cannelés
(Cannelé koogikesed)
Makes 16


500 ml milk
25 g butter
100 g plain/all-purpose flour
a pinch of salt
250 g sugar
4 egg yolks and 2 egg whites
1 Tbsp of rum
2 tsp of Bourbon vanilla extract

Whisk sugar, eggs and flour in a large bowl.
Bring milk and butter to a boil in a saucepan. Slowly whish into the egg mixture, stirring constantly.
Add vanilla.
Let cool to room temperature, then add rum.
The batter should be rather runny, just like a crepe batter.
Cover the mixture and keep it in the fridge for at least overnight or up to two days.
When ready to bake your cannelés, stir the batter again, and fill the prepared cannelé moulds three-quarters full.
Start baking at 275C, after 5-10 minutes lower the temperature to 200C and continue baking around 40-50 minutes until cannelés are dark golden to almost blackish brown*.
Extract from the moulds when cannelés are still hot. Cannelés should have a caramelised crust and be chewy, yet soft, inside.

Although I am very happy with the flavour of these cannelés, I have not yet figured out why my cannelés always 'climb' out of the moulds during baking. They finally fall back to the 'normal' size, but not always evenly, leaving the shapes somewhat uneven. I appreciate if you can give me a hint on this one.

* There seem to be two schools: those, who like cannelés golden brown outside and those who prefer them caramelised to black. At the stores in Bordeaux they are usually blackish.

You can read more about cannelés from these foodblogs: Chocolate & Zucchini, Kuidaore, La Tartine Gourmande (and Bea again), The Traveler's Lunchbox and 101 Cookbooks.

Previous guest posts on Nami-nami:
K is guest-blogging about Heston Blumenthal's perfect ice cream (August 2007)